
As part of a recent brief for a cycling related client, I thought I would create some gear cogs. After a few metasearches, I came up with nothing. Due to that, I decided to record my process and post it here as a tutorial.
Skill Level: beginner to intermediate
Time Required: 30-60 mins depending on skill level.
Tools used: Illustrator, rotate and duplicate, layers, gradients, pathfinder
Introduction
You will be creating a 10 speed bicycle cassette/cluster from scratch using illustrator CS5. I find it best to lock all non working layers as that way I do not have to stuff around selecting elements and it makes actions such as “select all” so much easier to use.

Step 1
Create a new Illustrator document with the following layers:
- Final artwork
- Working layer
- Concentric circles
Step 2
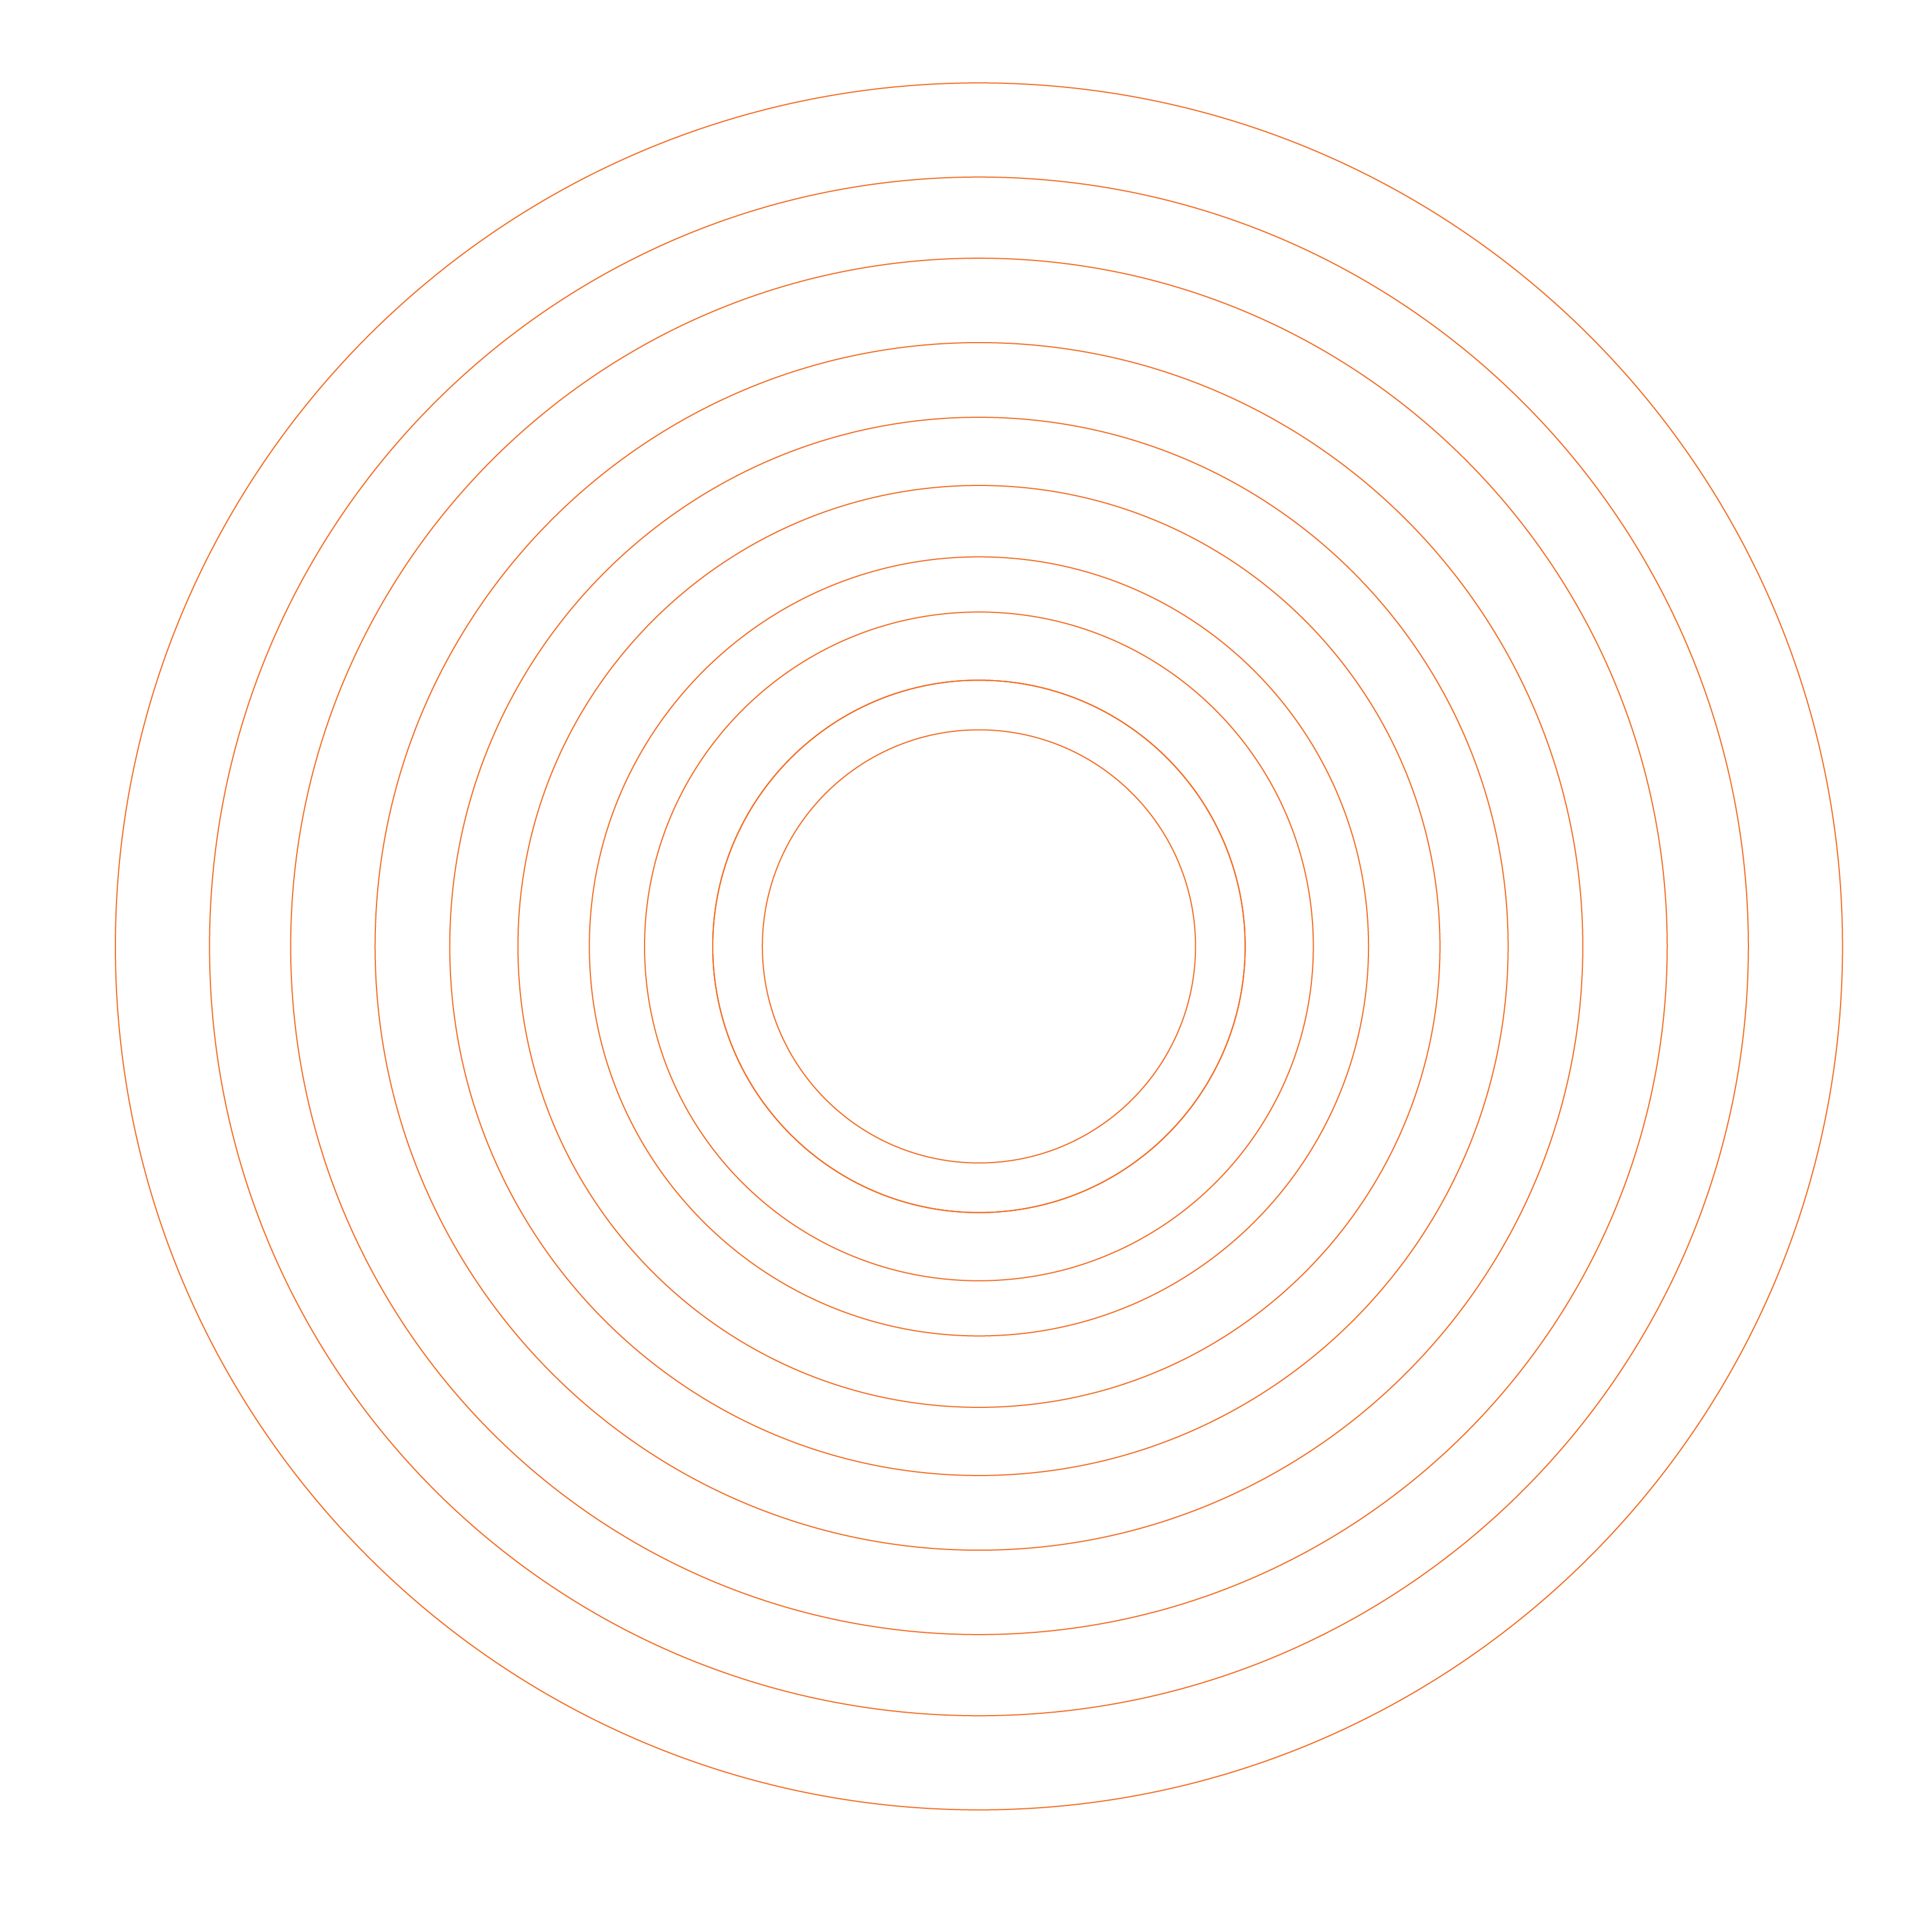
For this cluster, I am wanting it to be 10 speed. On the concentric circle layer, draw a series of 10 circles ensuring they are all centered at the same point.
Step 3
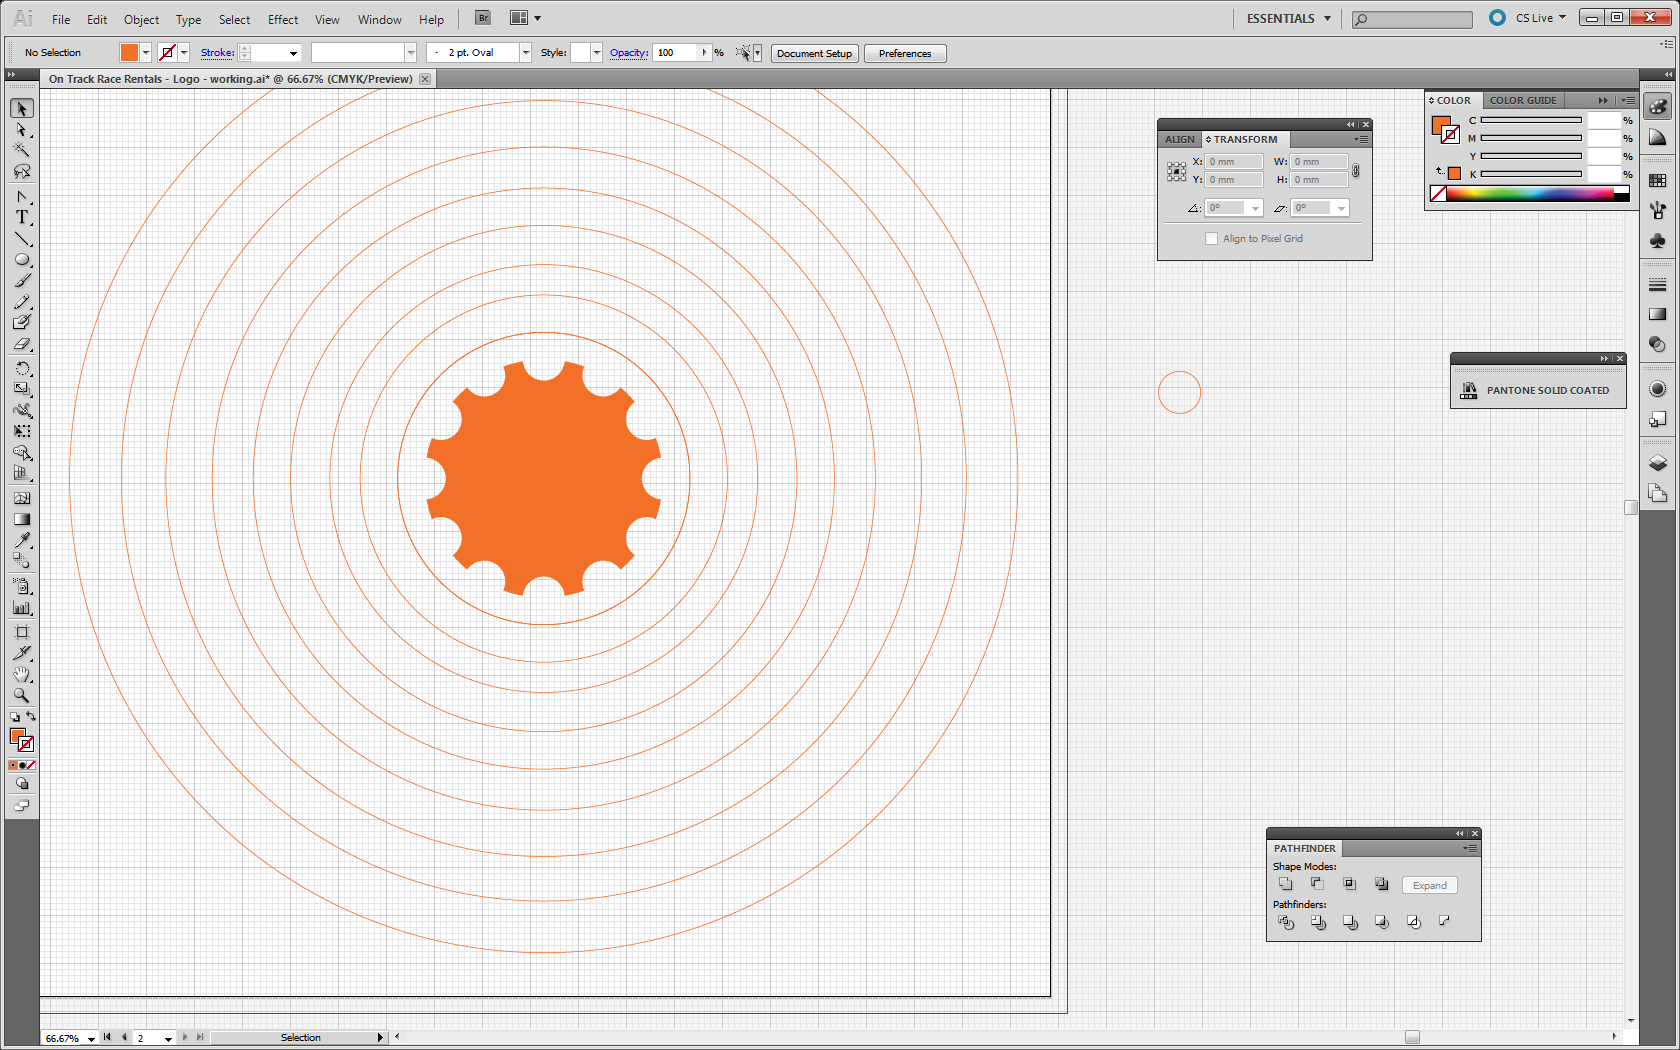
Onto the smallest circle, draw a smaller circle making sure the center of the smaller circle falls on the edge of the larger circle. Copy this smaller circle to and position it to the side of your artboard. Repeat this until you have a total of 10 smaller circles.
Move the large and small circle you are currently using onto the working layer. To do this, select the circles then select the working layer. Right click on your selection and from the drop down box and select arrange > send to current layer.

Step 4
Use the rotate tool to create a series of circles. You can find this tool on your side bar. I have moused over it in the image below to help you locate it. My actual process will involve right clicking on the elements I want to apply to rotate tool to.
Select both circles. Right click on them and select transform > rotate. Check the preview box and type in an angle. You will need to play around with this a bit to ensure the teeth look to be more or less the correct size. Click on copy to create an additional circle in addition to the first one. Use command or control D to duplicate the smaller circle all the way around the edge of the larger circle.
If you find the final tooth you create is too big or small, undo everything back to the start of this step and enter in a different angle. You may find this is pretty hit and miss, but as you continue to create the teeth, you should be able to guesstimate the correct angle more accurately.

The image below shows what your cog and teeth should look like.

Step 5
Select all items on the working layer and use the divide option of the pathfinder tool. Ungroup the created object and select the larger circle. Unlock the final artwork layer and send the created cog there. Lock the layer and return to the concentric circle layer.
Step 6
At this point I fill in all of the concentric circles and move one of the smaller circles onto each of the larger circles.
To make it easier to see the cogs I create, I give each of the large circles as well as the smaller circles a solid fill. In addition to allowing me to track things better, it also helps with positioning the larger cogs below the smaller cogs.
To assist with the spacing of the smaller circles, I set up a rectangle guide which I resize to cover all of the circles. The wide of the rectangle matches the spacing of the teeth I created on the first cog.

Step 7
To create the next cog, select the next set of large and small circles and move these onto the working layer. Repeat Steps 4-5 to create another cog. Continue these steps until you have all 10 cogs created.
Below you can see how the rectangular guide has helped with the spacing of the cogs.

Step 8
All of your cogs should now be positioned on the Final Artwork layer. Select them all and fill them with grey. Make the stroke black.
Here I selected the inner most cog and applied a radial white to black gradient to the design element.

As I was happy with the effect, I selected all of the cogs and applied the same gradient.

Step 9
Here I sit back and look at my image and think it is lacking something. I add a solid grey circle to cover the middle of the cog and call it quits.
Here you could add an end cap or additional artwork to create an axle if you wanted. My vector was going to be used at a greatly reduced size, so extra design elements were not necessary.
Conclusion
You have now created a fairly realistic looking rear cluster for a bicycle.
If you find any of these tutorials helpful, consider donating to the “keep Paul clothed and fed fund”. $1 will bag me a chocky bar. $4, a block of sweet goodness.